This time, we’re going to talk about How To Change Out A Shower Faucet Valve. There is a lot of information about Replacing Delta shower cartridge on the internet, of course. Social media are getting better and better quickly, which makes it easier for us to learn new things.
How To Replace A Shower Valve and Shower faucet and valve replacement - Parts and tools are also linked to information about Replace Shower Valve Without Cutting Wall. As for other things that need to be looked up, they are about how to replace a shower handle valve and have something to do with Types Of Shower Valve Stems.
57 Unexpected Facts About How To Change Out A Shower Faucet Valve | How To Replace A Shower Valve
- Debris and limescale can build up in your shower and on your shower valve. This can lead to the shower valve wearing out faster and leaking. In some cases, you can clean the shower handle and old valve, removing the limescale which may solve your problem. - Source: Internet
- Once the shower valve is in place, install the double-handle shower. First install the seats inside the pipe handles on the shower valve. Place the seat in the forward-facing valve openings, and turn the seats clockwise with a seat wrench. Install the stems in the pipe handles by sliding them inside the pipes and turning clockwise with a bath socket wrench. The last step is to install the handle trim and handles by placing them on the stems and tightening the handle screws with a screwdriver. - Source: Internet
- Shower valve cartridges usually break because of corrosion or a ring failure which causes leaks. Replace the part immediately to prevent the leak from getting worse. A small drip can soon become a flood of water inside the wall. This can expensive quick because changing the entire shower valve usually means replacing water lines, wall board, tile and grout too. - Source: Internet
- The first thing you need to do is determine the size and type of shower valve and cartridge you need to change, because most brands will have a variance in stems and splines. They’re typically not interchangeable. Moen, Delta, Kohler are just a few manufacturers that make shower valves. And to make things more complicated, different models made by the same manufacturer sometimes use a different cartridge. - Source: Internet
- Be careful as you work, you don’t want to damage the tub, tiles, glass or shower walls. You also don’t want to damage the shower valve assembly or the water lines supplying the valve. They’re very easy to cut with a grinder or hacksaw. - Source: Internet
- Although you need good skills on how to replace a shower valve stem, there are some things you can do yourself. How to replace shower valve cartridge is not a difficult task. With a little patience and simple skills, you will learn steps to replace shower valve. - Source: Internet
- Use the proper tool: A copper-tubing cutter scores through copper pipes without deforming the pipe, while a ratcheting pipe cutter neatly slices through plastic pipes. Loosen the clamps or screws holding the valve against its backing block, the horizontal bracing securing the valve body. Pull the old valve from the wall cavity. - Source: Internet
- During a major home renovation, or when you update counters and cabinets in the bathroom is a convenient time to change the faucet in your tub. One way to give the tub area a distinct, rustic look is to change the single-handle shower faucet to a double-handle unit. This project is involved but can be accomplished by plumbing-savvy homeowners. It starts with removing the existing faucet. - Source: Internet
- Soldering skills are important if you are joining copper pipes to the valve. Calculate the length, cut the pipes in the right places but be sure you can do it all by yourself. If the old pipes are still good, use them and move to the next task. - Source: Internet
- Once shower faucets drip water, things get messy, and you to have to know how to replace a shower valve to prevent water damage. A plumber can do a quick fix, but taking some easy steps to replace the shower valve yourself isn’t a bad idea. It is a way to save money and gain useful skills at the same time. - Source: Internet
- Some people may also choose to replace their shower valves when updating the bathroom design. It is the perfect opportunity to deep clean and changes out bathroom items. You might also change out your shower valves in the whole house for convenience. Diverter and thermostatic valves can make it easier to transition water from the showerhead to the tub. - Source: Internet
- The clip is easy to remove with a set of needle-nose pliers. Grip it with the pliers and pull it up and out of the shower valve.This is why the size of the hole matters. if the hole is too small to remove the clip, you won’t be able to pull out the cartridge. - Source: Internet
- Delta shower faucets are one of the most popular brands on the market due to their simple design, their performance, and their lifetime warranty. The best part? Acquiring spare parts is inexpensive and fairly easy to do. In fact, most home improvement stores carry Delta shower faucet parts. Otherwise, they’re also easily found online on sites like Amazon and Ebay. - Source: Internet
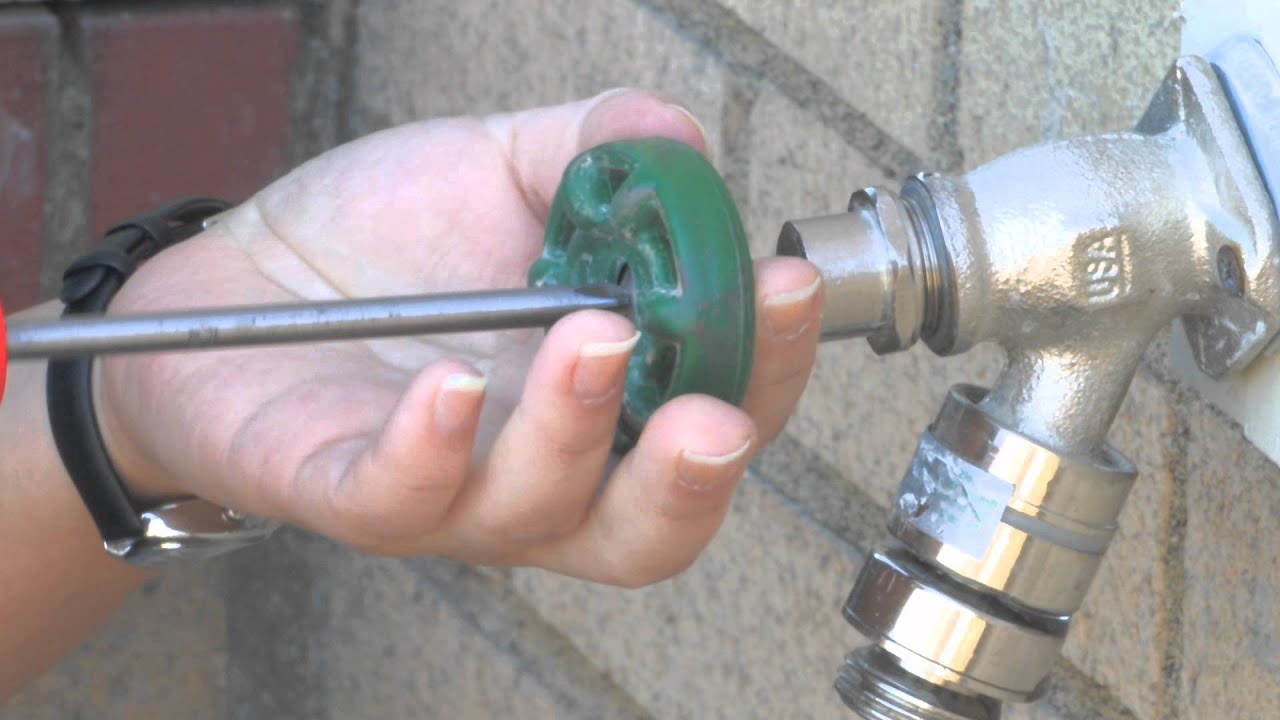
- Water stops are usually at the right or left side of your valve cartridge. Turn off both the hot and the cold water stops if the two are present. If there’s no other way of stopping the flow of water, cut off the main house source of water. - Source: Internet
- Depending on your existing shower setup, you may also need additional items like PEX tubing or female thread fittings. You may also decide to update your trim plate and other bathroom components when you replace a shower valve. Of course, you will also need a new shower faucet valve. - Source: Internet
- These are a few causes that may indicate that you need to replace a shower valve. An old valve can easily wear down and stop working correctly. If you are not sure that your problem falls into any of these categories, you may need to contact a licensed plumber. - Source: Internet
- Most shower valve handles are secured with a small screw you remove with an Allen Wrench. Sizes vary so get a set. Angle Grinder Or Hacksaw: Used for changing the hole size. - Source: Internet
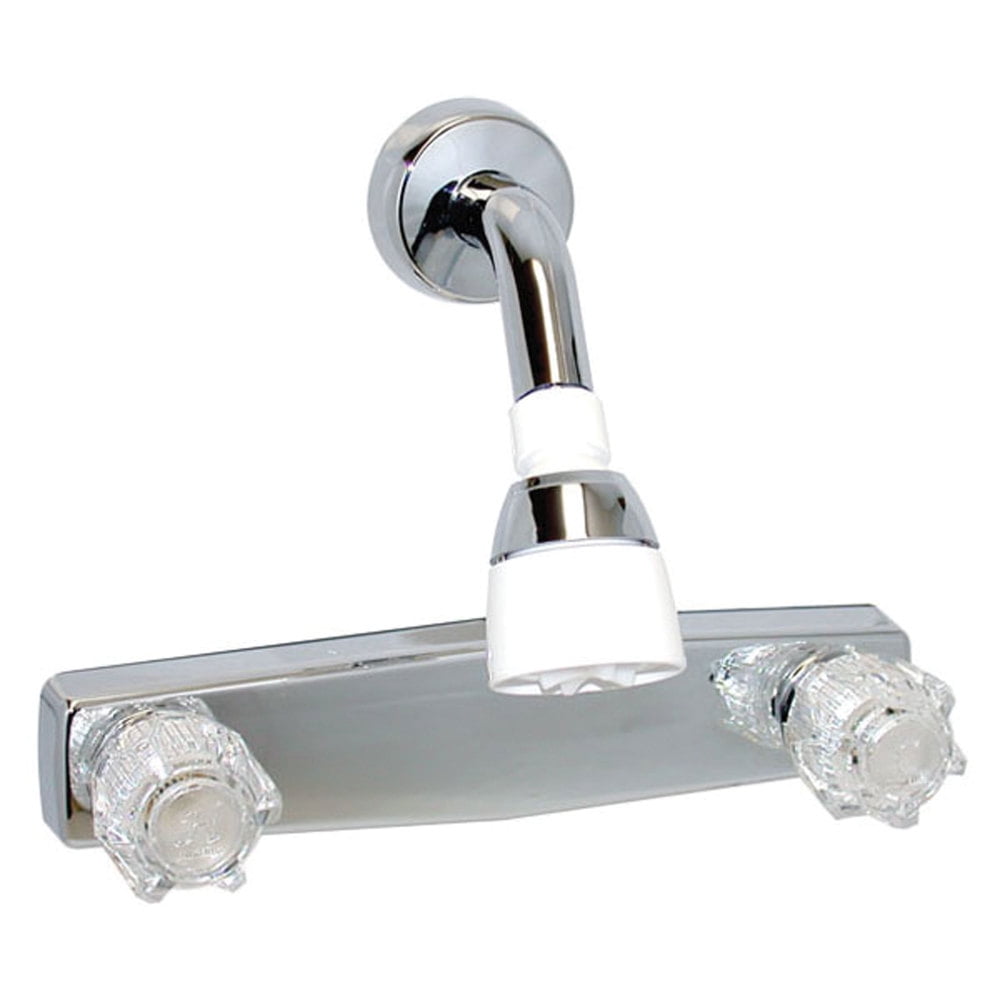
- Standard Valve Escutcheon Screws Handle Operation : Push/Pull and Rotate If this is your valve see the articles below for technical information. Moentrol Valve Escutcheon Screws Handle Operation : Push/Pull and Rotate If this is your valve, see Single Handle Shower: Moentrol Valve. PosiTemp Valve Escutcheon Screws Handle Operation : Rotate Only If this is your valve, see Single Handle Shower: PosiTemp Valve. M-Core 2 Series Temperature Indicators Handle Operation: Rotate Only If this is your valve see Single Handle Shower: M-Core Valve. M-Core 3 Series Temperature Indicators Handle Operation: Push/Pull and Rotate If this is your valve see Single Handle Shower: M-Core Valve. - Source: Internet
- If the hole is too small to remove the shower valve cartridge, make it bigger with your hacksaw or angle grinder. Just make it big enough to remove the cartridge. And make sure not to cut a bigger hole than the trim plate can cover. - Source: Internet
- The existing hole may not be large enough to access and replace the shower valve. You may need to cut a bigger hole in the wall to reach the valve. Ideally, you want a minimum of 12 inches by 12 inches to ensure you have enough room to work. Be sure not to make the hole in the wall too large as you want it to be covered when you replace the trim plate. You can use the trim plate to guide you on the hole size. - Source: Internet
- The biggest indicator that it is time to replace your shower valve is if your shower is leaking. If the leak is due to the valve, it should stop leaking as soon as you replace it. Replacing the shower valve as soon as possible is important. Otherwise, a leaking shower can put you at risk of water damage and increased water bills. - Source: Internet
- I always bring a standard and needle nose pliers. Needle nose pliers are used to remove the cartridge but a standard pliers comes in handy too. Allen Wrench Set: Most shower valve handles are secured with a small screw you remove with an Allen Wrench. Sizes vary so get a set. - Source: Internet
- Luckily, most shower valve issues can be fixed by simply replacing the shower valve cartridge and not the entire valve. This is essentially the inner working part of the valve. It can be removed and replaced while the exterior valve assembly and water lines remain in place. While this is a serious issue, most handy homeowners can fix it themselves as a weekend DIY project. - Source: Internet
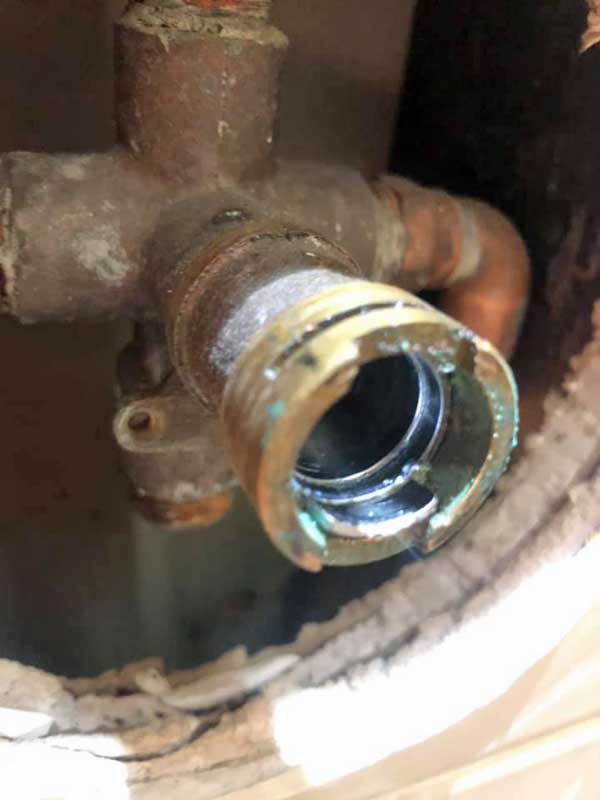
- Remove the section of wall needed to expose the valve and plumbing pipes. Take note of the water pipe’s route and any obstructions in the way. The new valve and all pipes connect the same way. Look for leaking pipes and signs of water damage. - Source: Internet
- If the shower valve cartridge can’t be removed because the hole in the shower wall is too small to remove the retainer clip or shower valve cartridge, use a hack saw or an angle grinder to make the hole bigger. Cut the tiles or shower wall just enough to remove the clip or cartridge. Make sure the hole is still small enough to fit entirely behind the trim plate. - Source: Internet
- Many homeowners make the decision to replace their old single-handle shower valve after removing the wall tile during a shower remodel and discover a sickly-looking, green corrosion covering the valve body and the copper pipes connected to it. Nobody wants to spend the money and time replacing wall tile only to have a water pipe spring a leak a couple of months down the road. While often left to a professional plumber, many DIY homeowners can complete this project in a couple of hours without any problems. - Source: Internet
- The water supply to the shower is typically controlled by two water stops located on either side of the shower valve cartridge. They can be turned off with a screwdriver. This isolates the shower valve from the rest of the water in the home. By turning these two screws, no water will flow into the valve cartridge which makes it possible to remove. This is a huge benefit because you can leave the water supply on for the rest of the house. - Source: Internet
- A brass retaining pin, located on top of the valve body, holds a single-handle Moen cartridge in place. Grip the retaining pin up with a set of pliers and pull it out of the valve body, being careful not to drop the pin into the wall cavity. Pull the cartridge with a Moen cartridge-extractor tool. Lubricate the cartridge’s O-rings with a small amount of plumber’s grease and push it into the shower valve. - Source: Internet
- Hold the new shower valve against the back bracing. Verify its depth guide, the round plastic shield attached to the valve’s face, sits flush with the wall tile’s surface. Adjust the back bracing as needed. - Source: Internet
- Could not get delta to send me free cartridge and HD would give free but no longer carry oem 1400 cartridge [they have non oem but that is not free]. Funny because just year earlier delta sent me free shower faucet with divertor. Anyways, ended up buying from AMZN US [was going there] as they had oem version cheaper [at least few years back]. - Source: Internet
- Wipe down the valve assembly with a paper towel to ensure that it’s completely dry. Wait a few minutes after the water is turned on and wipe again. If you find water on your towel there’s a leak. - Source: Internet
- Whenever I have to change a shower valve, I find out what model shower valve I’m dealing with and then contact my local plumbing supply. They’ve always been able to look up the correct cartridge for me. You could also look it up online or contact the manufacturer. - Source: Internet
- As the nation’s largest supplier of plumbing products, we make it easy to find the right parts for shower valve replacement projects. To access our complete online inventory, log in or sign up for your free ferguson.com account. - Source: Internet
- The trim plate is secured to the valve assembly with two screws. Typically they have a Phillips head. Simply remove the screws and pull off the trim plate over the valve stem. - Source: Internet
- Repairing a shower valve sometimes makes sense. A shower valve that drips water out its tub spout usually needs a replacement cartridge. Many single-handle shower valve models use a retaining nut to hold the cartridge in place. Simply remove the retaining nut and pull the old cartridge out with pliers. - Source: Internet
- Remove the depth guide. Install the shower valve’s trim package and handle, following the manufacturer’s instructions. Some installers place a small bead of caulking along the escutcheon’s outside edge before sliding it against the tile. This helps prevent moisture from entering the wall cavity. - Source: Internet
- Shower valves can get damaged, you have to get a replacement immediately to prevent water from leaking out completely. While this is a serious concern, you can fix it without seeking the help of a professional plumber. All you need is to pay attention to details and make sure nothing is left out. - Source: Internet
- The first thing to do is cover the drain with a cloth while you fix the faulty valve. Covering it also helps to prevent screws from falling off and getting lost. Keep all removed parts and screws in one place to use them again when needed. - Source: Internet
- Remove the depth guide. Valves with threaded ports require less plumbing skill than brazed ports. When using a valve with threaded ports, simply cover the male threads with a thread sealant and install the appropriate threaded pipe fitting onto the valve body. - Source: Internet
- Changing a shower valve cartridge is a fairly easy DIY project if your handy and have the right tools. They generally take about 20-30 minutes to remove and replace. Make sure you have everything you need before you get started or you’ll be running back and forth to the store all day. - Source: Internet
- With the help of a hex, remove the handle of the shower head faucet. There are different models of showerheads, and each requires a different hex key. Apart from the handle, use screwdrivers to remove the other parts of the showerhead. - Source: Internet
- Replace the shower valve cartridge, replacing the clip if needed. Replace the trim plate and shower handle. Pull tight to ensure that the handle is secure. Screw the screws back into place. - Source: Internet
- The trim plate is the flat backing piece that sits behind the handle. It covers up the shower valve assembly and the hole in the shower wall. The trim plate seals the hole from water, if the plate wasn’t there, or isn’t sealed properly, water would leak behind the wall. Once the handle is off you can remove the trim plate. - Source: Internet
- Install a cap on the tub stem and close off the shower port. Both ports use 1/2-inch fittings. Turn on the building’s water supply and leak test the shower valve. Turn off the water and repair any leaking fittings found. - Source: Internet
- It is always a good idea to evaluate your plumbing skills before beginning a project to replace a shower valve. It is best to have at least some plumbing knowledge. Otherwise, you may hire a professional plumber instead. - Source: Internet
- After turning off the the main water supply, turn on a nearby faucet to release pressure still inside the line. You can also flush a few toilets. This drains water still sitting in the lines. If your home is a 2-story, turn on faucets downstairs. This will suck water down below the shower so it won’t leak when you remove the valve cartridge. - Source: Internet
- Shower valves will naturally wear out over time. The bearing begins to break down and at first, you may notice small leaks until it is a larger leak. Normal wear and tear to any parts of the shower, including the trim plate, may indicate that it is time to replace a shower valve. - Source: Internet
- It is worth it to take the extra time to protect your shower components before you install a shower valve. Protect your shower drain and wall by covering the area with a protective cloth. Depending on the size of your shower, you might also cover the shower head. Avoid losing screws, especially down the drain. You also want to prevent screws from getting lost on the bathroom floor. - Source: Internet
- If you are using PEX pipe to install the new shower valve, then you will need Teflon tape to securely attach the male threads to the PEX pipe. Then, you will need to install the female threads. You can do this by using pipe crimp fittings. - Source: Internet
- Using a pair of pliers, take the metal end and remove the valve clip from the hole in the wall. Some showers may have a retainer nut, which you may also have to remove. You can pull the metal clip valve out using the valve cartridge. It is possible that you may be able to reuse the existing clip. If it is still in good shape, you can simply replace it when you install the new valve. - Source: Internet
- However, sometimes the debris and limescale damage the shower valve cartridge meaning you need a new cartridge. It is possible that you may not be able to determine if the leaking shower is due to limescale until you remove the trim plate. You may notice the limescale on the shower drain or outside of the tub spout, which likely means it is inside the trim plate also. - Source: Internet
- Once the trim plate is removed you can inspect the size of the hole in your wall. Compare the size of the hole with the size of the shower valve cartridge. If the hole isn’t big enough to fit the cartridge or retainer clip through, you’ll have to make it bigger. This is where the angle grinder or hacksaw are needed. - Source: Internet
- The most important thing is having the correct shower valve cartridge. If the new valve cartridge isn’t correct, you may have to order the right one and wait for it to arrive. This could leave you without a shower for a while. - Source: Internet
- Remove the escutcheon trim plate by unscrewing it from the wall. You may need to scrape away some of the caulk with a utility knife if it holds it in place. You will also need to unscrew both sides of the trim plate on the wall to access the valves. If you do have to remove caulk from the wall, you can usually easily replace it with some new caulk to ensure a secure fit. - Source: Internet
- A change in water pressure, sudden changes from hot to cold, and consistent leaking can all be a result of a faulty valve cartridge. If you know this is the problem, then instead of replacing the whole unit, you can simply just change the valve cartridge. So, how do you do this? - Source: Internet
- Use pliers to pull out the valve from the wall by firmly gripping the metal end of the cartridge. If the valve cartridge gets stuck, try to wiggle it a little before pulling it loose. Once it is out, place it in a safe place, or throw it away if you don’t need it anymore. - Source: Internet
- If you are not sure about the size of the hole to create, ask a professional plumber to do it. You can also search online on how to replace a shower valve assembly or steps to install shower valve. The information on the verified home improvement site will contain how to cut a hole into the bathroom wall properly. - Source: Internet
 Here are a few tips to help you find information about How To Replace Delta Shower Cartridge Rp46463:
- Look for good places to get information about Single Handle Shower: Standard Valve. This can be done in libraries, on websites, or even by paid journalists.
- When looking for information about Single Handle Shower: Standard Valve, it's important to know that there are different kinds of online sources, like Google and YouTube. Social media sites like Facebook and Twitter are also good places to look for information about Delta Shower Cartridge Removal Tool.
Here are a few tips to help you find information about How To Replace Delta Shower Cartridge Rp46463:
- Look for good places to get information about Single Handle Shower: Standard Valve. This can be done in libraries, on websites, or even by paid journalists.
- When looking for information about Single Handle Shower: Standard Valve, it's important to know that there are different kinds of online sources, like Google and YouTube. Social media sites like Facebook and Twitter are also good places to look for information about Delta Shower Cartridge Removal Tool.Video | How To Change Out A Shower Faucet Valve
To get the best information about Types Of Shower Valve Stems, you should read to find out how true each source is.
This article has a few videos from different places about Removing Shower Valve Stem that will help you learn more about it. The Internet is a great place to find out about a wide range of things.
## Here are some crucial points concerning Removing Shower Valve Stem:- How To Fix A Shower Faucet Valve
- How To Replace A Shower Handle Valve
- How To Change Out A Delta Shower Faucet Cartridge
- How To Change A Shower Faucet Valve
- How To Change A Shower Handle Valve
With so many websites and forums that talk about How To Replace Delta Shower Cartridge Rp46463, it shouldn’t be hard to find what you need.
Most people are used to getting information about Replacing Shower Valve Behind Wall in a very different way than this. It lets you look at the information about Types Of Shower Valve Stems and how it can be used in more detail.
 ways to put information about Single Handle Shower: Standard Valve in a way that looks good and is useful. They can be used in business and marketing, and they can also be used to talk about Replace Old Delta Shower Cartridge. So, we also give you some pictures about Replace Shower Valve From Front.
In the end, this article gives a summary of how to replace a shower faucet valve stem. Also talked about are how to replace a shower faucet valve stem and Replace Shower Valve From Front, which you can use to compare how much you know about Types Of Shower Valve Stems.
